Các bước tạo ứng dụng Servlet trên eclipse:
- Cấu hình Tomcat 7 trên eclipse.
- Tạo project "Dynamic Web Project" trên eclipse.
- Tạo lớp Servlet.
- Cấu hình Servlet.
- Tạo trang index.
- Chạy ứng dụng.
Nội dung chính
Cấu hình Tomcat 7 trên eclipse
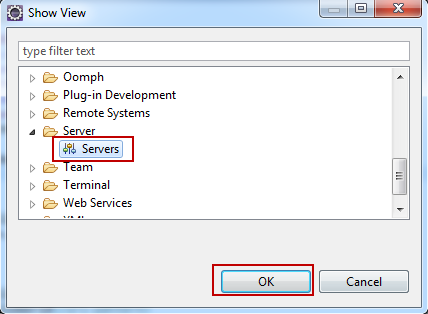
Chọn Window -> Show View -> Other -> Server -> Click OK.
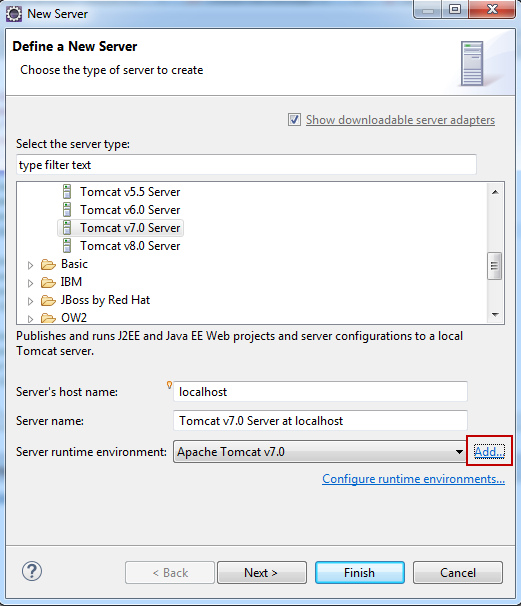
Click vào link như trong hình sau:

Chọn Tomcat v7.0 Server -> click Add.
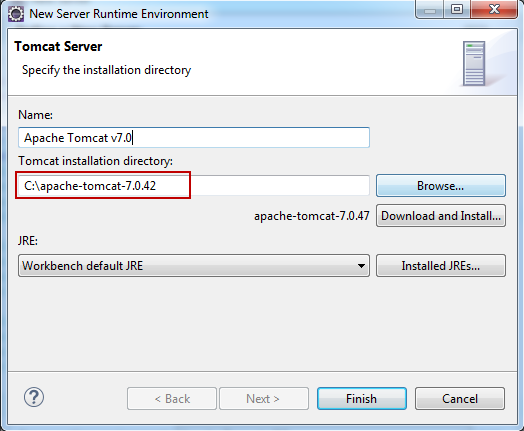
Nhập Tomcat installation direction là đường dẫn đến thư mục tomcat server trên máy tính của bạn:
Tạo project "Dynamic Web Project" trên eclipse
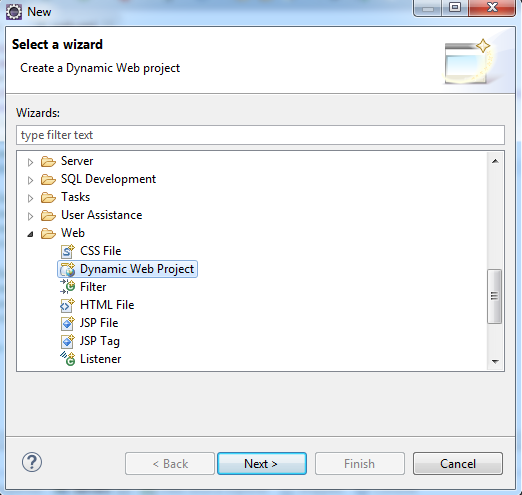
Chọn New -> File -> Other. Tại cây thư mục chọn Web -> Dynamic Web Project -> Click Next.
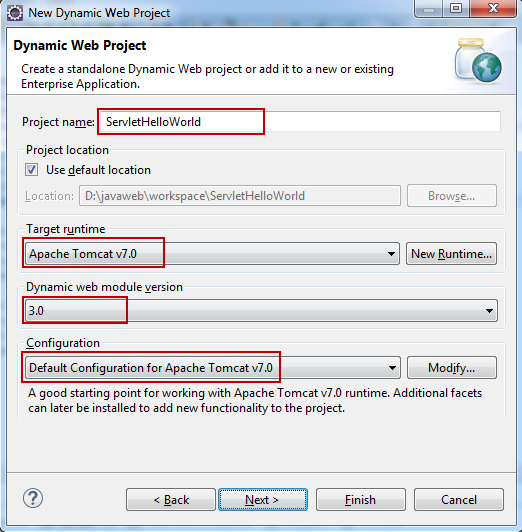
Nhập tên project là "ServletHelloWorld" và các thông số khác như trong hình.
Click Next -> Next -> Tích vào checkbox Generate web.xml deployment descrptor.
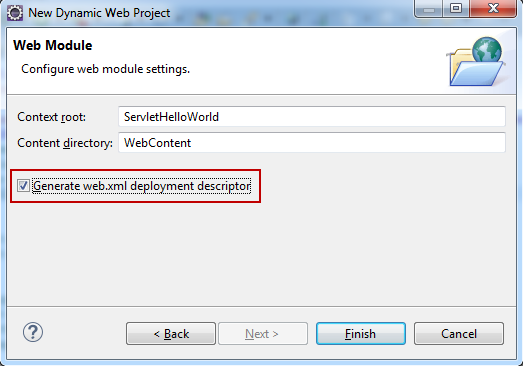
Click Finish.
Tạo lớp Servlet
Bạn nên tạo lớp Servlet bằng cách extends lớp javax.servlet.http.HttpServlet, một lớp trừu tượng thực hiện giao diện Servlet và được thiết kế đặc biệt để xử lý các yêu cầu HTTP.
Tạo lớp vn.viettuts.HelloWorld extends lớp javax.servlet.http.HttpServlet. Để hiển thị message "Hello World" với nội dung như sau:
File: HelloWorld.java
package vn.viettuts;

import java.io.IOException;
import java.io.PrintWriter;

import javax.servlet.ServletException;
import javax.servlet.http.HttpServlet;
import javax.servlet.http.HttpServletRequest;
import javax.servlet.http.HttpServletResponse;

public class HelloWorld extends HttpServlet {
    private String message;

    public void init() throws ServletException {
        // Do required initialization
        message = "Hello World";
    }

    public void doGet(HttpServletRequest request, HttpServletResponse response)
            throws ServletException, IOException {

        // Set response content type
        response.setContentType("text/html");

        // Actual logic goes here.
        PrintWriter out = response.getWriter();
        out.println("<h1>" + message + "</h1>");
    }

    public void destroy() {
        // do nothing.
    }
}
Cấu hình Servlet
Bạn có thể cấu hình để sử dụng servlet HelloWorld vừa tạo ở trên trong file WebContent/WEB-INF/web.xml như sau:
<?xml version="1.0" encoding="UTF-8"?>
<web-app xmlns:xsi="http://www.w3.org/2001/XMLSchema-instance"
 xmlns="http://java.sun.com/xml/ns/javaee"
 xsi:schemaLocation="http://java.sun.com/xml/ns/javaee
 http://java.sun.com/xml/ns/javaee/web-app_3_0.xsd"
 id="WebApp_ID" version="3.0">
 <display-name>ServletHelloWorld</display-name>
 <welcome-file-list>
  <welcome-file>index.html</welcome-file>
 </welcome-file-list>

 <servlet>
  <servlet-name>HelloWorld</servlet-name>
  <servlet-class>vn.viettuts.HelloWorld</servlet-class>
 </servlet>

 <servlet-mapping>
  <servlet-name>HelloWorld</servlet-name>
  <url-pattern>/HelloWorld</url-pattern>
 </servlet-mapping>

</web-app>
Tạo trang index
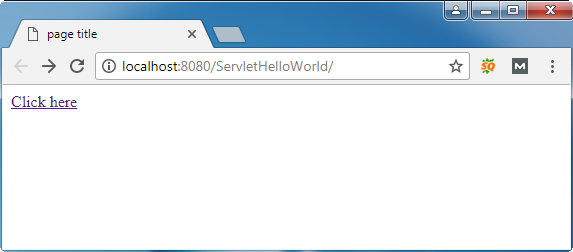
Tạo trang index.html như trang index của ứng dụng web được cấu hình trong file web.xml.
<!DOCTYPE html>
<html>
<head>
<meta charset="UTF-8">
<title>servlet demo</title>
</head>
<body>
    <a href="/ServletHelloWorld/HelloWorld"> Click here </a>
</body>
</html>
Chạy ứng dụng
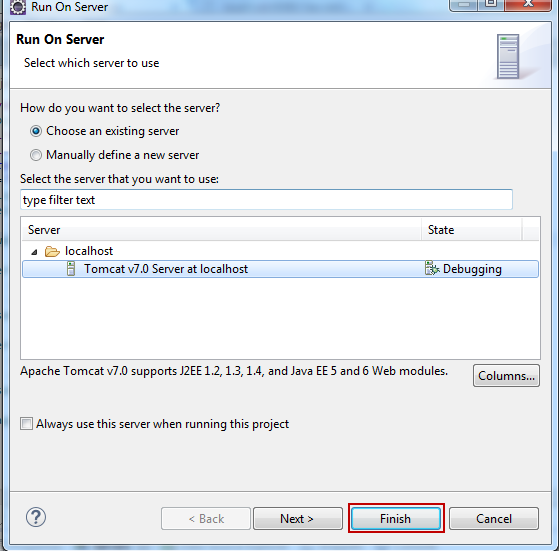
Để run ứng dụng java web trên eclipse bạn làm như sau: click chuột phải vào project -> Run As -> Run On Server.
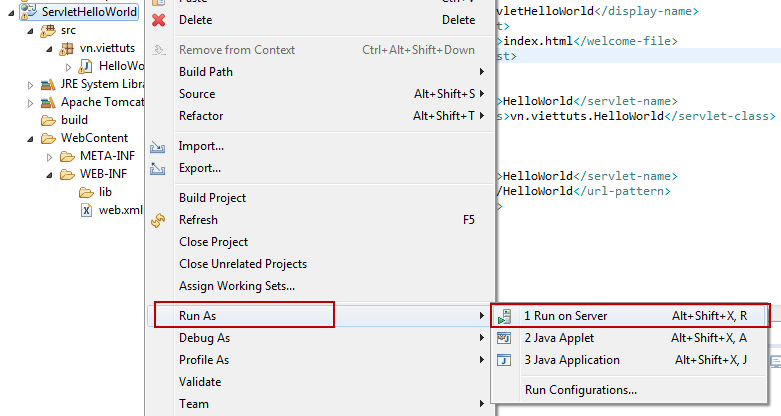
Click Finish.
Kết quả chạy ứng dụng trên, trang index tạo ở trên có nội dung như sau:
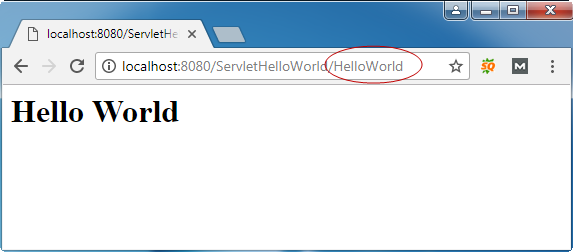
Nhập đường dẫn servlet "HelloWorld" như đã cấu hình như ở trong file web.xml hoặc click vào link "Click here", kết quả:
