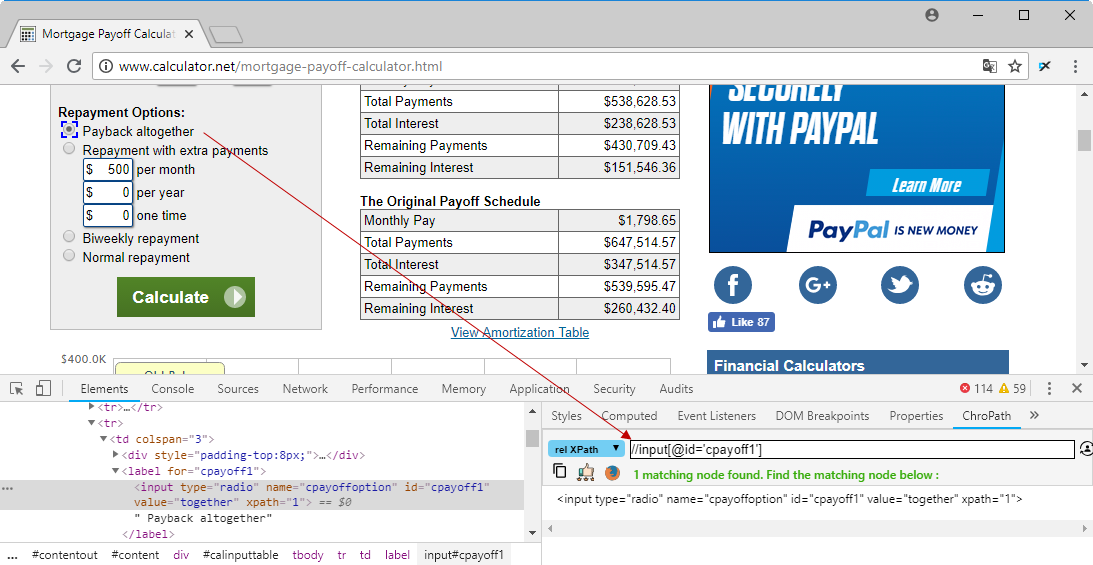
Trong phần này, chúng ta sẽ hiểu cách Selenium WebDrive tương tác Radio Button. Chúng ta có thể chọn một tùy chọn radio button bằng cách sử dụng phương thức 'click' và bỏ chọn bằng phương thức 'click'.
Xác định XPath bằng cách sử dụng ChroPath plugin trên trình duyệt Chrome. Ví dụ này sử dụng trang web http://www.calculator.net/mortgage-payoff-calculator.html

Nội dung chính
Ví dụ
package vn.viettuts.selenium;

import org.openqa.selenium.By;
import org.openqa.selenium.WebDriver;
import org.openqa.selenium.chrome.ChromeDriver;

public class RadioButtonDemo {
    public static void main(String[] args) throws InterruptedException {

        System.setProperty("webdriver.chrome.driver",
                "D:\\SeleniumWebdriver\\chromedriver.exe");
        WebDriver driver = new ChromeDriver();

        // Open website
        driver.navigate().to("http://www.calculator.net"
                + "/mortgage-payoff-calculator.html");

        // Maximize the browser
        driver.manage().window().maximize();

        // Click on Radio Button
        driver.findElement(By.id("cpayoff1")).click();
        System.out.println("Is Selected: "
                + driver.findElement(By.id("cpayoff1")).isSelected());
        System.out.println("Is Enabled: "
                + driver.findElement(By.id("cpayoff1")).isEnabled());
        System.out.println("Is Displayed: "
                + driver.findElement(By.id("cpayoff1")).isDisplayed());

        // Click on other Radio Button
        driver.findElement(By.id("cpayoff1")).click();
        System.out.println("Is Selected "
                + driver.findElement(By.id("cpayoff2")).isSelected());

        // Close the Browser.
        driver.close();
    }
}
Kết quả:
Is Selected: true
Is Enabled: true
Is Displayed: true
Is Selected false

