Nội dung chính
Giới thiệu Data Binding trong Angular
Liên kết dữ liệu (Data Binding) có sẵn ngay từ AngularJS và tất cả các phiên bản Angular được phát hành sau này. Chúng ta sử dụng dấu ngoặc nhọn để liên kết dữ liệu - {{}}; quá trình này được gọi là nội suy. Trong bài Component trong Angular7 chúng ta khai báo giá trị cho biến title và giá trị của nó được hiển thị lên trình duyệt.
Biến trong file app.component.html được gọi là {{title}} và giá trị của title được khởi tạo trong file app.component.ts và trong app.component.html, giá trị được hiển thị.
Ví dụ Data Binding trong Angular với vòng lặp for
Bây giờ chúng ta sẽ tạo drop-down các tháng trong năm bằng cách tạo một mảng tháng trong app.component.ts như sau:
import { Component } from '@angular/core';

@Component({
  selector: 'app-root',
  templateUrl: './app.component.html',
  styleUrls: ['./app.component.css']
})
export class AppComponent {
  title = 'Angular 7';

  // khai bao mang cac thang.
  months = ["January", "February", "March", "April", "May", "June", "July",
      "August", "September", "October", "November", "December"];
}
Chúng ta sẽ tạo thẻ select với các option. Trong option, chúng ta sử dụng vòng lặp for. Vòng lặp for được sử dụng để lặp mảng months, do đó sẽ tạo ra các thẻ option với giá trị được lấy ra từ mảng months.
*ngFor = “let I of months”
Và để nhận được giá trị của tháng, chúng tôi đang hiển thị nó trong:
{{i}}
Cập nhật nội dung cho file app.component.html
<!--The content below is only a placeholder and can be replaced.-->
<div style="text-align:center">
  <h1>
    Welcome to {{ title }}!
  </h1>
</div>

<div> Months :
  <select>
    <option *ngFor = "let i of months">{{i}}</option>
  </select>
</div>
<br/>

<router-outlet></router-outlet>
Kết quả:

Ví dụ Data Binding trong Angular với lệnh if
Bây giờ chúng ta hiển thị dữ liệu trong trình duyệt dựa trên điều kiện. Chúng ta sẽ thêm một biến và gán giá trị là true. Sử dụng câu lệnh if, chúng ta có thể ẩn / hiện nội dung cần hiển thị. Ví dụ:
app.component.ts
import { Component } from '@angular/core';

@Component({
  selector: 'app-root',
  templateUrl: './app.component.html',
  styleUrls: ['./app.component.css']
})
export class AppComponent {
  title = 'Angular 7';

  // khai bao mang cac thang.
  months = ["January", "February", "March", "April", "May", "June", "July",
      "August", "September", "October", "November", "December"];

  showAge = true;
}
app.component.html
<!--The content below is only a placeholder and can be replaced.-->
<div style="text-align:center">
  <h1>
    Welcome to {{ title }}!
  </h1>
</div>

<div> Months :
  <select>
    <option *ngFor = "let i of months">{{i}}</option>
  </select>
</div>
<br/>

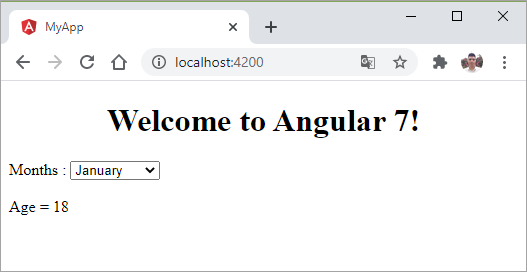
<div *ngIf="showAge"> Age = 18 </div>

<router-outlet></router-outlet>
Kết quả:

Ví dụ Data Binding trong Angular với lệnh if then else
VD1: Trong trường hợp nếu biến showAge là false. Để in điều kiện khác, chúng ta sẽ phải tạo ng-template như sau:
<ng-template #condition1>Hide Age.</ng-template>
app.component.ts
import { Component } from '@angular/core';

@Component({
  selector: 'app-root',
  templateUrl: './app.component.html',
  styleUrls: ['./app.component.css']
})
export class AppComponent {
  title = 'Angular 7';

  // khai bao mang cac thang.
  months = ["January", "February", "March", "April", "May", "June", "July",
      "August", "September", "October", "November", "December"];

  showAge = false;
}
app.component.html
<!--The content below is only a placeholder and can be replaced.-->
<div style="text-align:center">
  <h1>
    Welcome to {{ title }}!
  </h1>
</div>

<div> Months :
  <select>
    <option *ngFor = "let i of months">{{i}}</option>
  </select>
</div>
<br/>

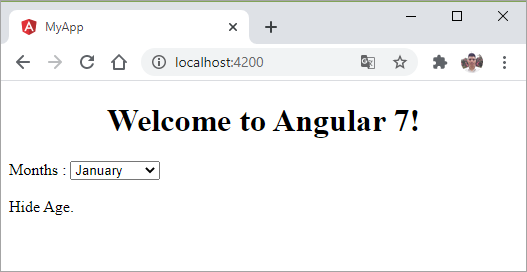
<div *ngIf="showAge; else condition1"> Age = 18 </div>
<ng-template #condition1>Hide Age.</ng-template>

<router-outlet></router-outlet>
Kết quả:

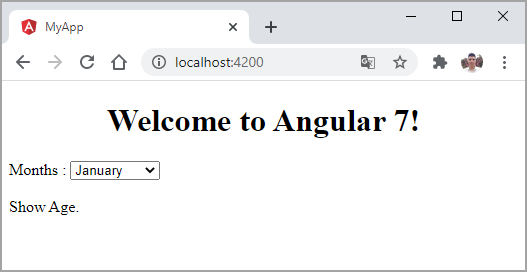
VD2: Trong trường hợp nếu biến showAge là false. Để in các điều kiện khác, chúng ta sẽ phải tạo ng-template như sau:
<div *ngIf="showAge; then condition1 else condition2"> Age = 18 </div>
<ng-template #condition1>Hide Age.</ng-template>
<ng-template #condition2>Show Age.</ng-template>
Kết quả:


